Create a Custom Report
Create Custom Reports Using Report Designer
To create a custom report from scratch, Calibration Control (our Calibration Management Software) uses a database language called SQL (pronounced ‘sequel’). We use SQL SELECT statements to tell the database what fields and records from what tables and in what order we want our data displayed. Therefore, as a prerequisite to this help topic, read the SQL SELECT statement help topic first.
Create a Custom Report
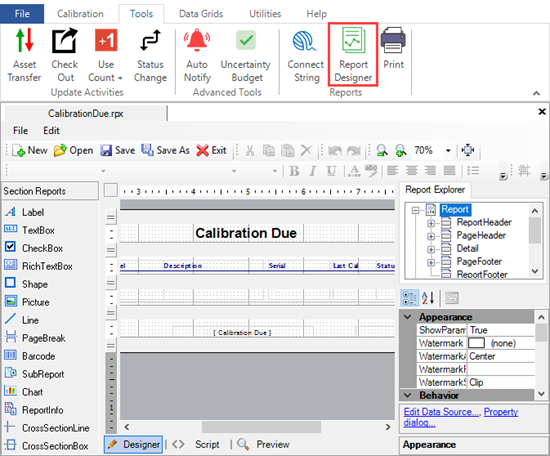
To begin, let’s assume we want to create a new Calibration Due Report for all of the equipment due before the end of next month. Select the ‘Report Designer’ icon from the Tools tab of the ribbon menu. This is a blank slate to drag fields into whatever location desired in the report ‘Detail’. To use one of Ape Software's default reports, click [Open] and choose one of the available [.rpx] files.
Define Report Data Source
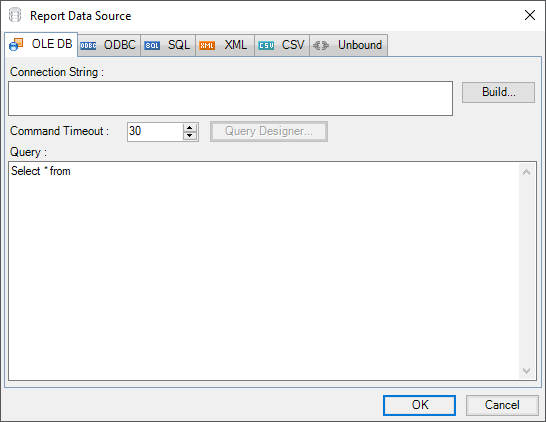
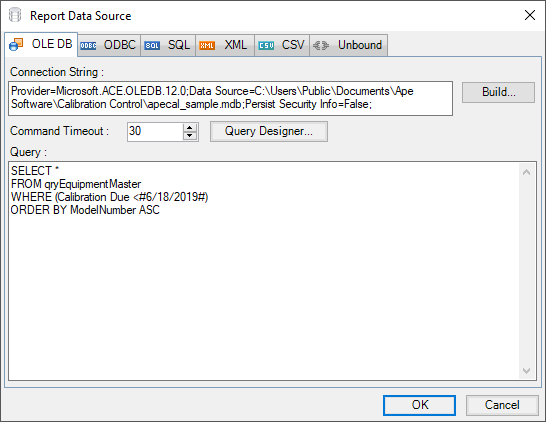
If you click on the [Edit Data Source...] link in the bottom-right corner of the Report Designer a blank Report Data Source dialog will appear. The Connection String field defines the connection to the database being used. The Query field defines the fields and records needed from a specific table and in a defined order.
Connection String - Choosing the Provider
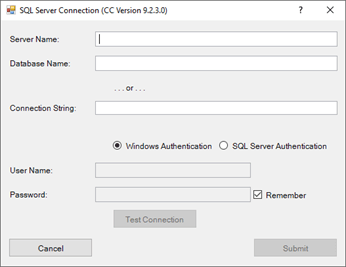
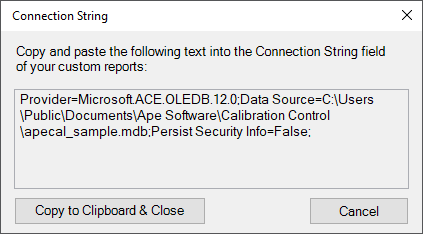
The easiest way to change the connection string is to select the Connection String icon from the ribbon menu. This will show the same connection string the Ape application is using to connect to the database. Click the [Copy to Clipboard & Close] button and paste the result into the Connection String field of the Report Data Source dialog.
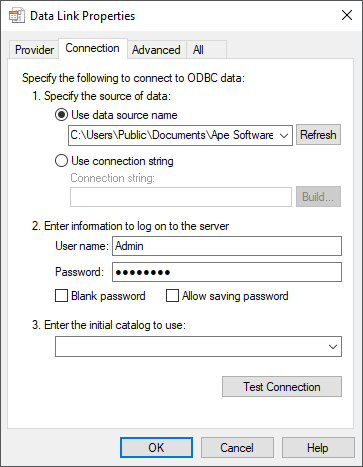
Otherwise, build the connection string by clicking the [Build] button to the right of the Connection String text box and the Data Link Properties will be shown. Click on the Provider table if it is not already displayed. Assuming you want to connect to an Access database (i.e., apecal.mdb), select the 'Microsoft Office 12.0 . . .' provider and click the [Next] button. If connecting to an instance of SQL Server, select the SQL Server OLE DB Provider.
If this does not work, ask your database administrator (DBA) for assistance in choosing the correct provider.

Connection String - Setting the Connection
Continuing the assumption that you need to connect to the apecal.mdb file, paste the path to the apecal.mdb file in the Data Source field. With help on finding your database, read the Locating Database File help topic. The entire path will look something like this:
C:\Users\Public\Documents\Ape Software\Calibration Control\apecal.mdb
After entering the path to the database, click the [Test Connection] button and a ‘Test connection succeeded’ response should show. If the connection is unsuccessful, repeat the above steps until it is.
Writing a SQL Select Statement
When the SQL SELECT statement has been created, it will look something like the following picture. Note that the Calibration Due field is set to a specific filter of less than 6/18/2019. This date is called a parameter (report variable), which can be changed with every printing. See the help topic on Report Parameters to learn how to add Parameters to SQL statements.
Adding Fields, Labels, and Report Info
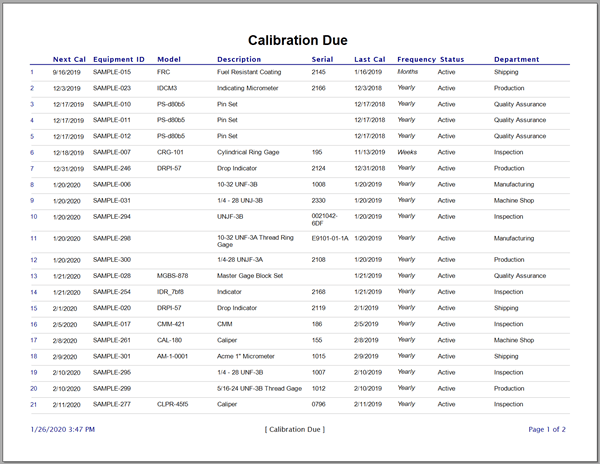
In the image at the top of this page, I performed the following actions to create the Calibration Due report:
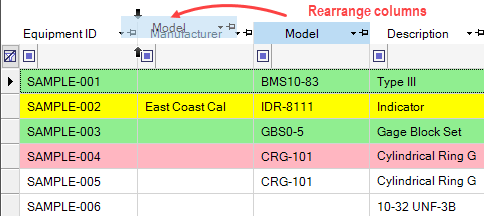
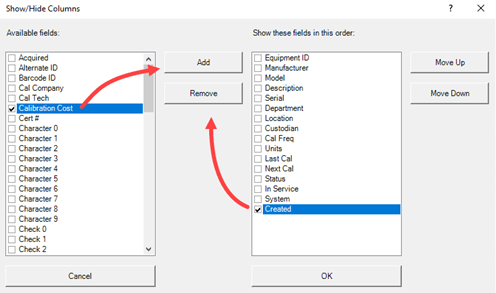
- Dragged the bound fields (e.g., Equipment ID, Model & Description) from the right side of the page (Fields - Bound tree) to their current location in the Detail band and resized them to fit their contents.
- Selected the Date fields and edited their properties (bottom-right corner of screen) so that the OutputFormat = 'M/d/yyyy'.
- Dragged Label objects from the left side of the screen to locations above each field in the page header, resized them to fit their corresponding fields, bolded, and underlined them. The page title (Calibration Due Report) was created the same way.
-
Report Info objects were dragged from the left side of the screen to the left and right side of
the footers. I clicked on each object and changed their properties (bottom-right) to . . .
- Set the Format String property of the date/time field to '{RunDateTime:M/d/yyyy}'
- Set the Format String property of the page number field to 'Page {PageNumber} of {PageCount}'
- Clicked the right-align button (top of page) for the page number field.
- Other minor tasks involving bolding, underlining, aligning, and positioning were made to make the report look the way I wanted it to look.
Menu Settings
Assuming the custom report is stored in the Ape application Reports folder, the default file name of the new report in the report menu will be the file name. Override the file name displayed by entering a preferred name in the User Data field of the report properties. Also, to place the new report under the first or second node of the report tree, place a 1 or 2 before the other text in the User Data field. For example, entering ‘1 My New Report’ in the User Data field will place the name ‘My New Report’ under the first node.
Preview and save the Report Layout
Preview the report by clicking the 'Preview' tab at the bottom of the Report Designer window. Save the report layout by selecting the [Save] button at the top of the Report Designer Window.
Choose a save file location and name your report ‘my due cal report’. The file location defaults to the Report folder under the Files Folder (select Open Files Folder from the File drop down menu) for the Ape application to find it.