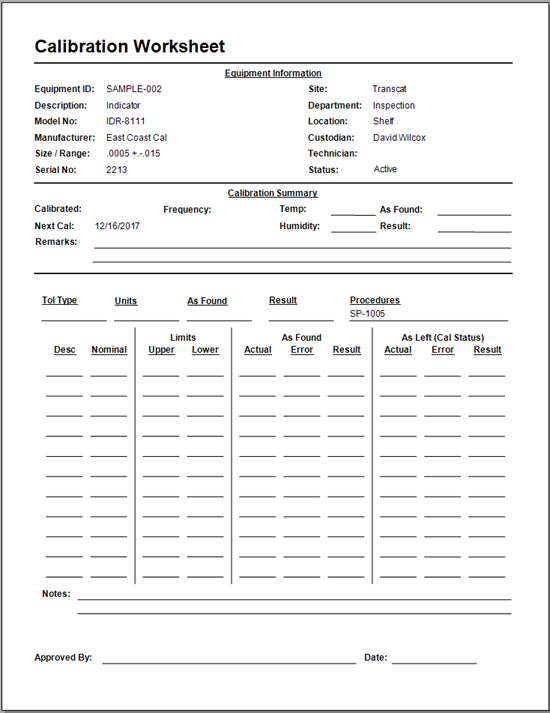
UDL File for Database Connection
Universal Data Link for Database Connection
Use a Universal Data Link (UDL) file when the Ape software Program Files are installed on a central file server and the central database is a SQL Server. The UDL file is then used to define the SQL Server and database name. Finally, the UDL file is consumed by creating a program shortcut with a switch pointing to the UDL file.
Without using a UDL file, an Ape setting file on each of the Client computers (i.e., general.config) requires a property that defines the location of the database server and database. This means the database location is defined, and can be changed, in multiple locations.
Create Universal Data Link (UDL) File
Follow these steps to create a UDL file:
- Open Windows Explorer to the location where the UDL will be created.
- Right-click and select New -> Text Document, naming the file something like "apedb.txt".
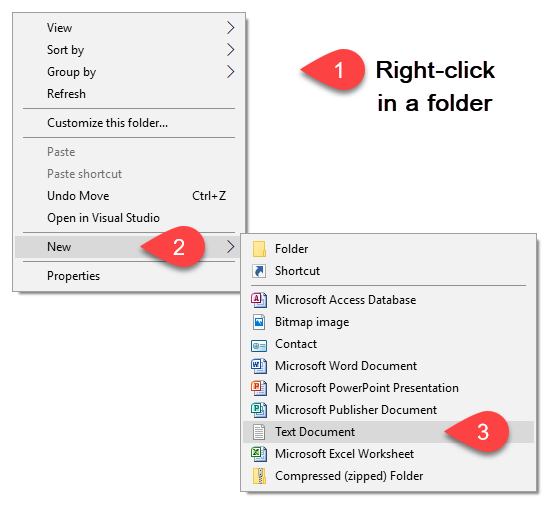
- Change the extension of the new text file to "udl" with an end result of "apedb.udl".
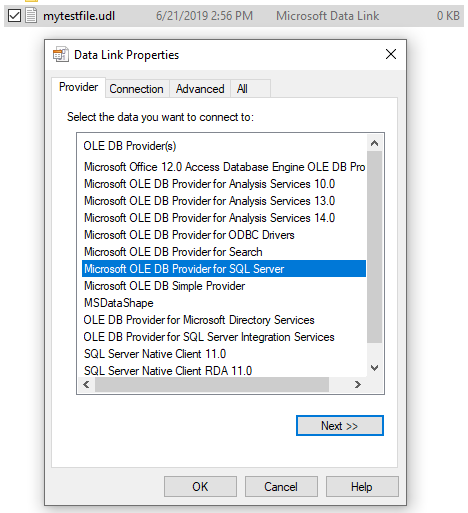
- Double-click on the new file to open the Data Link Properties dialog. Select the Provider tab and select the "Microsoft OLE DB Provider for SQL Server".
- Select the Connection tab and enter the (1) Server Name where the Ape Calibration database is located, (2) select Windows NT Security, and (3) select the database name.
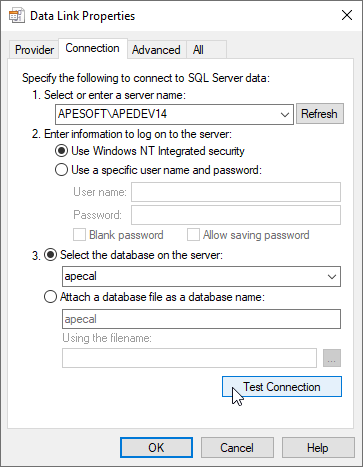
- Click the [OK] button to save the UDL file settings.
Create Shortcut
Now create a new Shortcut to the "apecal.exe" executable with a switch at the end in the format of -udl:"[path statement of udl created in previous steps]" and include the quotations. Ensure both path statements are valid for all Client users.
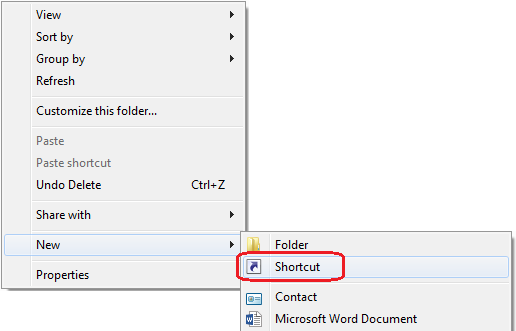
- While still in Windows Explorer, right-click and select New -> Shortcut.
- In the Create Shortcut dialog, add the "[executable path]" -udl:"[udl path]" statement like below.
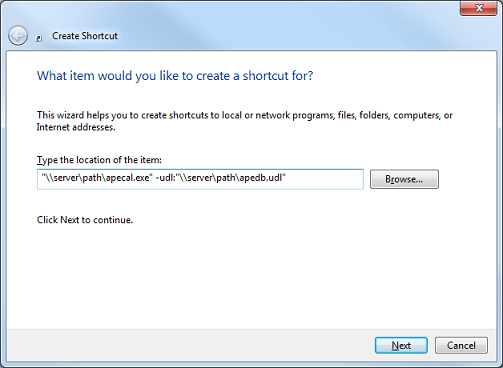
- Click the [Next] button, give the Shortcut a name like "Calibration Control" and then click the [Finish] button.
Copy Shortcut to Clients
Remember that even though the Program Files for Calibration Control are installed on a File Server, the program itself actually runs on the Client computers. Therefore, each Client computer must have the Minimum Requirements.
- Ensure the Minimum Requirements are installed on the Client computer.
- Copy the newly created Shortcut to a Client computer.
- Test the new shortcut.
If you need help making this feature work, please Contact Us for help.
Last Updated: 19 August 2019