Work Orders
Create and manage Work Orders within Calibration Control (our Calibration Management Software). Link related records of Equipment, Companies, Part Numbers, People, Attachments, Documents and Notes to a Work Order.
View Work Orders
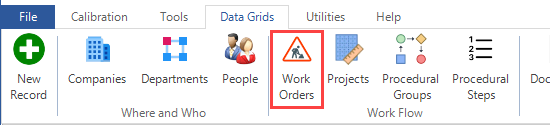
Select the Work Orders icon from under the Data Grids tab of the ribbon menu. (If the Work Order icon is not showing in your ribbon menu, the feature may be hidden by default.) Refer to Visibility Options to unhide this feature, if necessary.
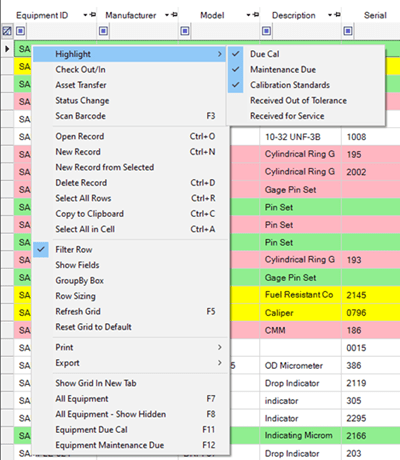
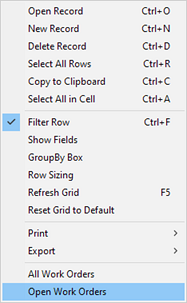
From the Work Orders grid, you can add new WO records, open and edit WO records, or delete Work Orders. Right-click in the grid for the context menu to change the grid view between All Work Orders or Open Work Orders.
Work Order Dialog
The 'Edit Work Order' dialog provides several useful fields for organizing Work Order information. These fields are defined next. Link and/or view all linked equipment records from the right-side panel (described further down).
Submit tab
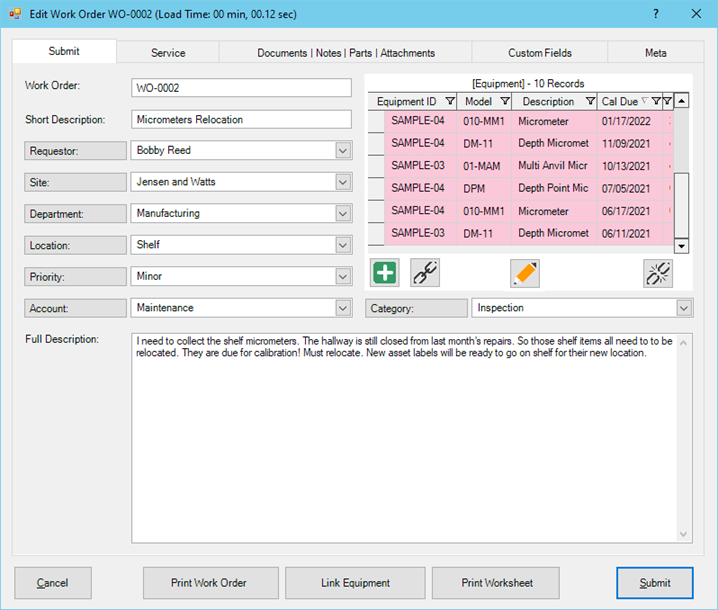
Work Order Numbers: Create a new record and enter a Work Order Number. The Work Order Number can auto-increment - - just like the Number Masks Options for the Equipment IDs and Calibration Certificate numbers.
More fields under the Submit tab of the Work Order dialog are as follows:
- Short Description: A Short Description summary to quickly identify the nature of this Work Order.
- Requestor: The Person can be selected from this combo-box. If the person does not yet exist as a record, click directly on the [Requestor] field name to quickly add a name.
- Site: The Customer / Site company can be selected from this combo-box. If the company does not yet exist as a record, click directly on the [Site] field name to quickly add its record. If the company record has already been created but does not appear as a Site, view the Company record to modify the Company Type and link it so it appears in this list.
- Department: The Department can be selected from this combo-box. If the Dept does not yet exist as a record, click directly on the [Department] field name to quickly add a new record.
- Location: The Location can be selected from this combo-box. If the desired Location Code does not yet exist as a record, click directly on the [Location] field name to quickly add a new code.
- Priority: The Priority can be selected from this combo-box. If the desired Work Order / Project Priorities code does not yet exist, click directly on the [Priority] field name to quickly add a new record to this combo-box.
- Account: The Account can be selected from this combo-box. If the Account record does not yet exist, click directly on the [Account] field name to quickly add a new one to the combo-box.
- Category: The Category can be selected from this combo-box beneath the panel of linked Equipment. If the appropriate Service Category does not yet exist, click directly on the [Category] field name to quickly add a new one to the combo-box.
- Full Description: A Full Description field is available for remarks or notations regarding the purpose of this Work Order.
Linking Equipment
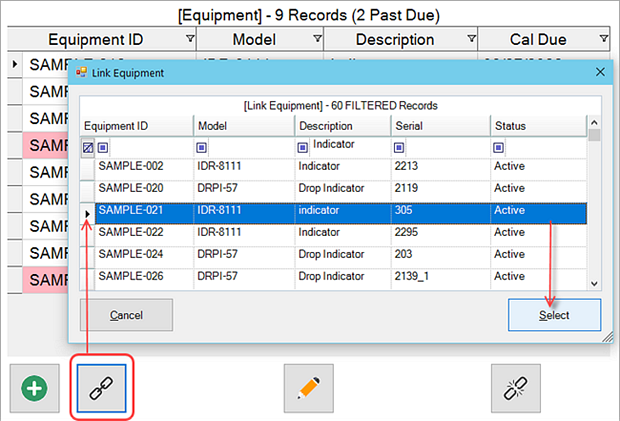
Linking Equipment to the Work Order: From the panel grid labeled 'Equipment' on the right, click on the chain-link icon to filter and link the related Equipment records to this Work Order record.
Linking Calibration/Customer Equipment to Work Order: Now, with a newly added button at the bottom of the Edit Work Order dialog, select the Site (or Customer) and adjust for the due dates for Next Cal to create a Work Order. Refer to our help video at the bottom of this page about this.
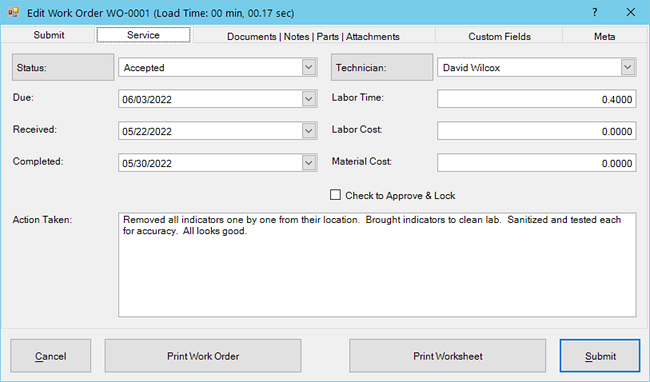
Service Tab
The Service tab of the Edit Work Order dialog is useful to mark its progress and establish dates. Fields from the Service tab of the Work Order record are as follows:
- Status: The current Status can be selected from this combo-box. If the code does not yet exist as a record, click directly on the [Status] field name to quickly add a new one.
- Due: The Due Date of the Work Order.
- Received: The Received Date of the Work Order.
- Completed: After the Work Order has been finished, record the date of completion.
- Technician: The Person servicing this Work Order can be selected from the combo-box. If the person does not yet exist as a record, click directly on the [Technician] field name to quickly add a person's name.
- Labor Time: Record the estimated or the true labor time required to complete this Work Order service.
- Labor Cost: Record the estimated or true labor cost required to complete this Work Order.
- Material Cost: Record the cost of materials and tools required to complete this Work Order.
- Action Taken: This is available for full-length notes recorded by the Technician to document any / all remarks of action required, steps taken, and progress notes leading up to completion.
- Check to Approve & Lock: Checking the box in this tab approves and locks the current record from future editing.
- And if the current user is signed-in to the software with User Authentication, their name and the date can appear on the W.O. report (described below).
- More customizable fields are available in its own tab; see 'Others' below.
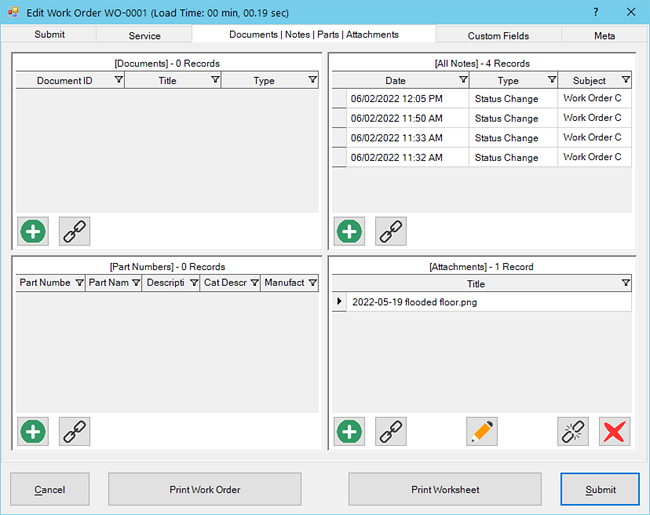
Documents | Notes | Parts | Attachments
Within these 4 panel grids, you can create New or Link existing Documents, Notes, Part Numbers, and Attachments. Filter and sort through each of the panel grids record selection with the top Filter Row.
Others
- The Custom Fields Tab: Custom fields are available for adding Characters, Dates, Numbers, and Check boxes. Visit the Change Field Names help topic to learn how to edit these fields.
- The Meta Tab: This is a READ-ONLY information tab used as a reference to view which user created the record and which user was the last to edit it; including the dates and times these occurred.
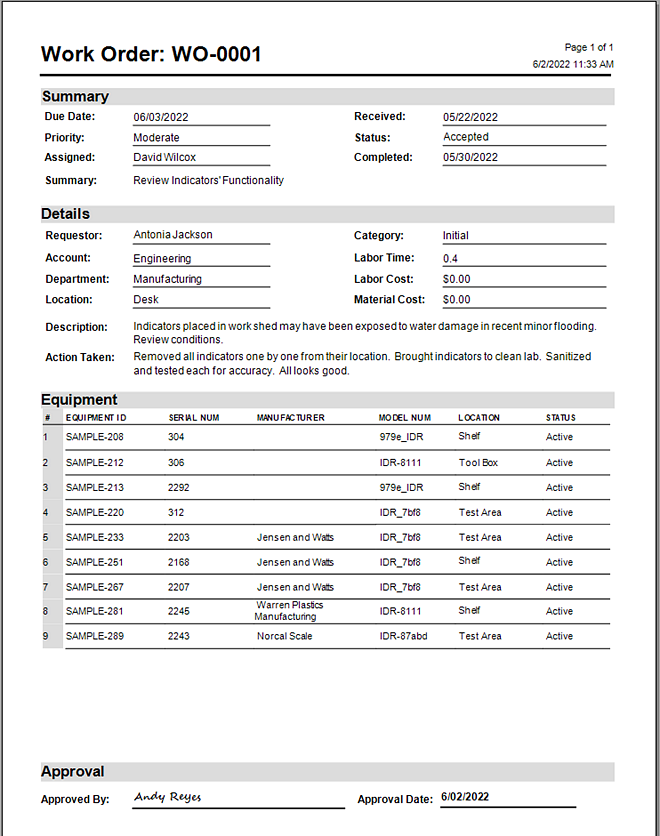
Work Order Report
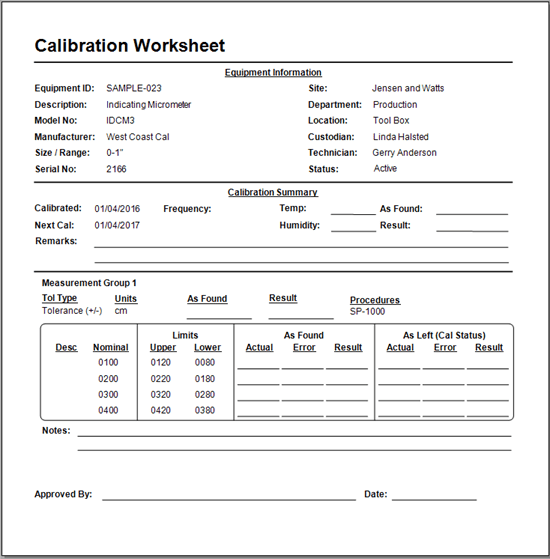
A Work Order worksheet can be printed from this Work Order record with the [Print Worksheet] button at the bottom of the dialog. After completion, click the [Print Work Order] button at the bottom of the dialog for the Work Order Report.
A Work Order report template is included with Calibration Control. Below is a print-preview of the stock default Work Order Report template:
You can also customize your own Work Order Report with the built-in Report Designer and set the new template as your default report in Options > Report & Label.
Watch a video for the newer Work Order feature button to Link Equipment:
Last Updated: 22 May 2023