Attachments & Pictures
Upload or point to an existing file, folder, hyperlink URL, and store it as an Attachment record in Calibration Control (our Calibration Management Software) and create shared access to the attached files, (e.g., Cal Certificate PDF, Spreadsheets, Supplier Forms, Pictures and Images, etc.).
Edit Attachment records; change a title to something more recognizable and specific than its file name; create categories, add notes, all without altering the item / file itself. Link attachments to data records of Equipment, Calibrations, People, or Companies. And by setting up a Common Files Folder path (see Multi-User Environment), any of the Attachments added in Calibration Control can be opened from different machines and all other users.

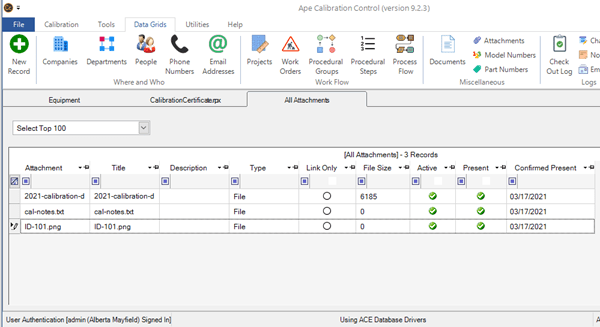
Attachments Grid
The Attachments grid, located in the Data Grids tab of Calibration Control ribbon menu, displays all existing attachment records information such as file name, size, title, description, etc. When an attachment is verified to be present, you can quickly open the attachment file itself by right-clicking a record and select Open Attachment. Otherwise, select Open Record to edit its record.
Context Menu
Right-click anywhere on the grid to open the context menu. From the Attachments context menu, you can select different views of the Attachments such as all attachments, attachments linked to records of Equipment, Calibrations, People, Companies, or Unlinked Attachments that exist but are not linked to records.
Add or Link to a File, Folder or URL
Use any of the following methods to create a new record in the Attachments grid or an Attachments sub-panel grid of another record:
- By clicking on the green plus sign [+] New Record icon of the ribbon menu
- By right-clicking within the grid and selecting New Record from the pop-up context menu
- By hitting [Ctrl+N] keys
- By double-clicking unpopulated gray area around the grid rows
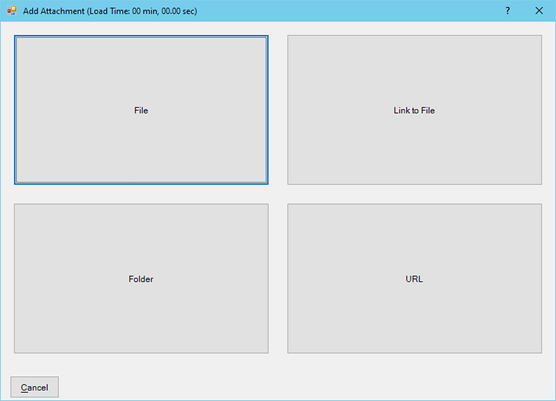
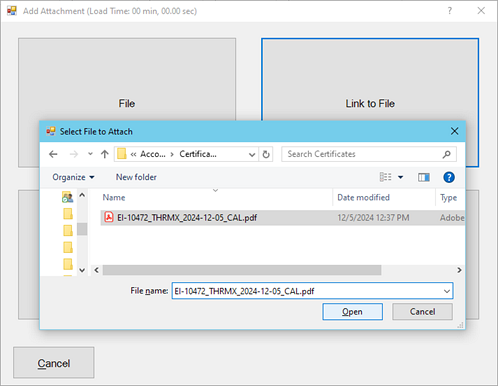
Selecting [Add File] means a copy of the attachment will be made and saved in the Attachments folder located in the Files Folder. The [Link to File] selection means the file being attached will stay at its current location and a link to that location will be saved in the database.
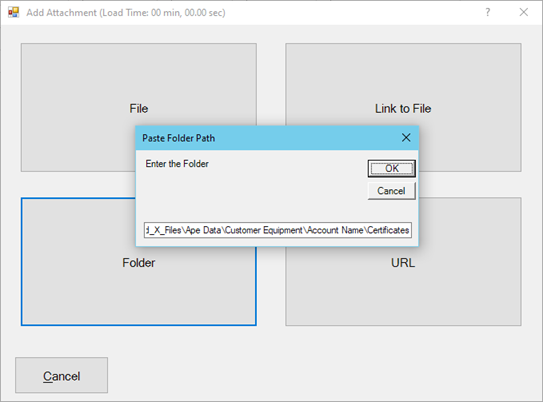
Adding a link to a specific folder is helpful if more than one file is being attached. The [Add Folder] and [Add URL] buttons allow a user to copy and paste a path to a specific folder (directory) or website.
Edit Attachment Record
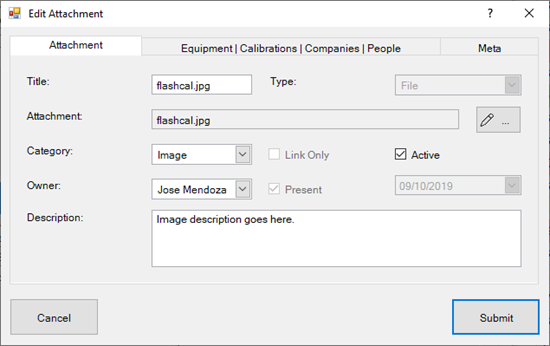
Within the Attachments grid, or even Attachments sub-panel grid inside another data record, you can right-click or double-click on an attachment record to edit that record title and add information related to it such as category, owner (if the image is of a piece of equipment), and add a note description.
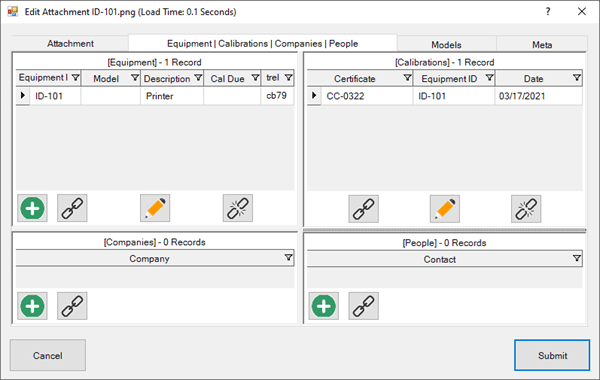
From the Equipment |Calibrations | Companies | People tab, you can view all records linked to the attachment. You can add new, or link and unlink records from here for this attachment record. Similarly, in the Models tab, you can add, link, and unlink Model records for this attachment.
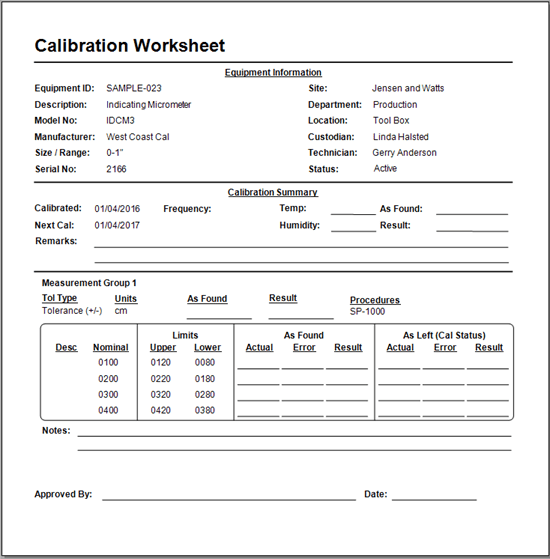
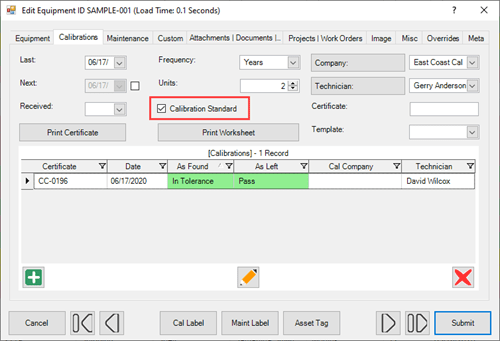
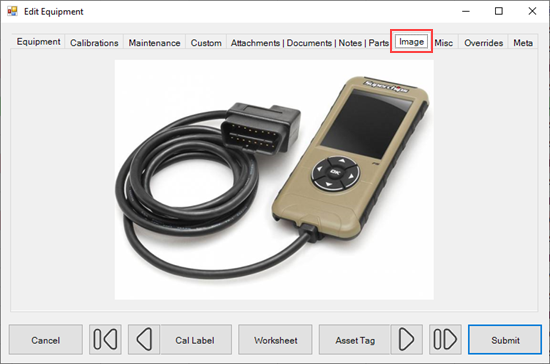
Attach Images in Equipment Records
To create a default image for an equipment record, click on the [Image] tab within a selected Edit Equipment dialog. If no image is linked, you'll see a message "Right-click, Double-click or Drag & Drop to Link an Image." Double clicking will open a grid of existing attachments that are image files. Alternatively, you can drag and drop any image file and Calibration Control will create an Attachment record for that image and link to the Equipment record. Once you have an image linked, you can right-click to open the image, unlink the existing image or link a different an existing image.
Add or Link Attachments for Equipment
Add attachments to an Equipment record by double-clicking on a record and navigating to the 'Attachments | Documents | Notes |Parts' tab, where you will find the [Attachments] panel grid. Use this panel grid like you would any other grid: Add, Link, Edit, Unlink, or Delete attachments. To add a new attachment click on the green [+] button and choose whether to add a File, Link to File, add a Folder path, or a URL path.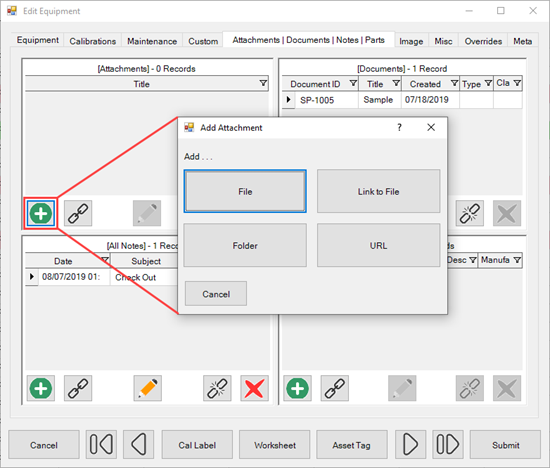
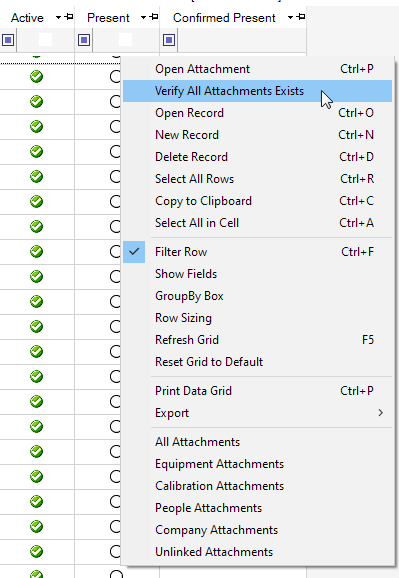
Verify Present
View the Attachments grid and open the right-click context menu. Select Verify All Attachments Exist and wait for the response dialog confirming the number of audited attachments. When Attachments are verified, a green checkmark appears in the 'Present' column along with the date of 'Confirmed Present' in the grid. If an attachment was not verified, it likely was moved to a different location, renamed, or is otherwise not accessible to Calibration Control. If all attachments were not confirmed present, your Files Folder was likely changed but the existing Attachments folder content was not moved to that new folder location.
About the Attachments Folder
How can attachments be stored and be opened from the software? All data records created in a Calibration Control database generate a globally unique identifier (GUID). Attachments are records; these, too, have GUIDs. The attachments store in the Attachments folder of the Files Folders that Calibration Control uses to maintain files. The actual attached file is placed in an auto-generated subfolder named by the GUID of its data record. (This is why users should only use the Calibration Control software to create attachments! Do not drop files directly in the physical Attachments folder or it will not be recognized nor retrievable by the software when added this way.) If you do not wish to store a separate copy of the file for Calibration Control, then select the 'Link To' method when you are creating a new record. This method creates an Attachment record but only opens to the linked file path, such as the file already existing on your network, instead of maintaining a unique copy. Note, if a specific network path changes in the future, the attached Link can be broken, resulting in the software unable to retrieve that attachment. To rectify this, a new Attachment record would need to be created to point to that modified network path.
Attachments Video
The video link below shows how to use this feature in an older version of Calibration Control. While the software appearance may differ, the concept remains true for getting started with this feature in Calibration Control.